




- Email[email protected]
- Phone+962 797 166 177
- Birthday1982-09-25
- LocationAmman, Jordan
Unlocking Your Home Network: Setting Up a Tailscale Subnet Router
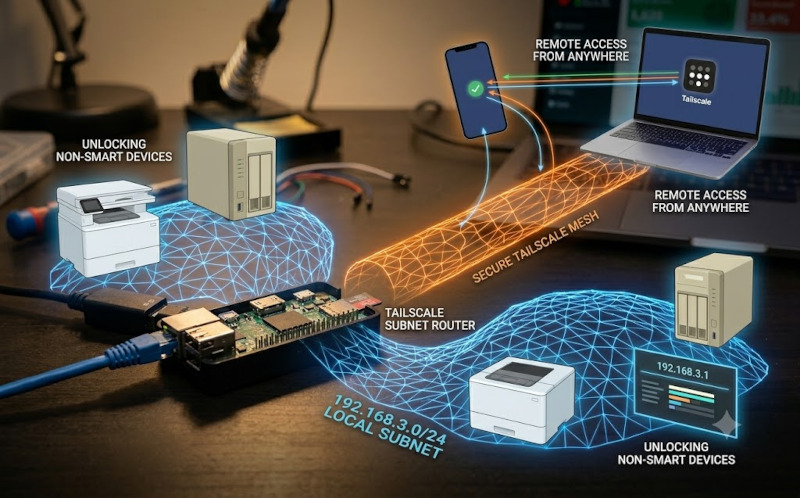
Over the last few posts, we’ve built out some robust IoT infrastructure. But what happens when you are away from home and need to securely access "dumb" network devices—like your ISP's default router admin panel, a networked printer, or a bare-metal NAS—that cannot natively run a VPN client?
Instead of opening dangerous ports to the internet, you can create a secure bridge. In my own home lab, I use a dedicated Raspberry Pi Zero 2 W as a Subnet Router to expose my main 192.168.3.x local network to my Tailscale mesh.
Here is the exact step-by-step process I use to set up a Tailscale subnet router and access any non-smart network device remotely.
Step 1: Prep and Clean the Pi
Before installing new networking tools, it's always best practice to ensure your operating system is fully up-to-date and free of unnecessary bloat. SSH into your Pi and run:
Bash
sudo apt update && sudo apt upgrade -y
sudo apt autoremove -y
Step 2: Install and Enable Tailscale
Tailscale provides a handy convenience script that handles the installation automatically. Once it's downloaded and installed, we will enable the daemon so that Tailscale automatically boots up whenever the Pi restarts.
Bash
curl -fsSL https://tailscale.com/install.sh | sh
sudo systemctl enable --now tailscaled
Step 3: Enable IP Forwarding
For your Raspberry Pi to act as a router—passing traffic between your Tailscale network and your physical local network—you must enable IP forwarding at the OS level. We'll write these rules into a new configuration file and apply them immediately.
Bash
echo 'net.ipv4.ip_forward = 1' | sudo tee -a /etc/sysctl.d/99-tailscale.conf
echo 'net.ipv6.conf.all.forwarding = 1' | sudo tee -a /etc/sysctl.d/99-tailscale.conf
sudo sysctl -p /etc/sysctl.d/99-tailscale.conf
Step 4: Advertise Your Local Routes
Now, it is time to tell Tailscale which local subnet you want to share. Replace 192.168.3.0/24 with whatever subnet your local DHCP router uses. We also include --accept-dns=false so the Pi doesn't get its DNS settings tangled up if you are running a custom setup (like the Pi-hole we built previously!).
Bash
sudo tailscale up --advertise-routes=192.168.3.0/24 --accept-routes --accept-dns=false
To make sure all these fundamental network changes lock in perfectly, give the Pi a quick reboot:
Bash
sudo reboot
Step 5: Approve the Routes in the Admin Console
By default, Tailscale won't just blindly route traffic to a new subnet—this is an intentional security feature to prevent rogue nodes from hijacking your routing tables.
To authorize the connection:
-
Open your web browser and log into the Tailscale Admin Console.
-
Navigate to the Machines tab and find your Raspberry Pi in the list.
-
Click the three dots (...) on the right side of the Pi's entry and select Edit route settings.
-
Under the "Subnet routes" section, you will see the subnet you just advertised (e.g., 192.168.3.0/24). Check the box to approve and enable it.
Step 6: Configure Your Client Devices
The subnet is now successfully broadcasting to your Tailscale mesh! However, the devices you are using to connect remotely (like your phone or work laptop) need to know they are allowed to use this new path.
On any Linux or macOS device connected to your Tailscale network that needs access to the home subnet, run this command:
Bash
sudo tailscale set --accept-routes
(Note: If you are using the Tailscale app on Windows, iOS, or Android, "Use Tailscale subnets" or "Accept network routes" is usually enabled by default in the app settings/preferences, but it's always worth verifying if you can't connect!).
And that's it! You can now type your local router's IP address (e.g., 192.168.3.1) directly into your browser from halfway across the world, and it will load as if you were sitting right in your living room.
"If you've got any questions or need a hand wrangling your own setup, don't hesitate to reach out at [email protected] or connect with me via www.yazan.me. I'm always keen to help out!"