




- Email[email protected]
- Phone+962 797 166 177
- Birthday1982-09-25
- LocationAmman, Jordan
Locking Down the Lab: Secure Your Services with Cloudflare Tunnels & Zero Trust
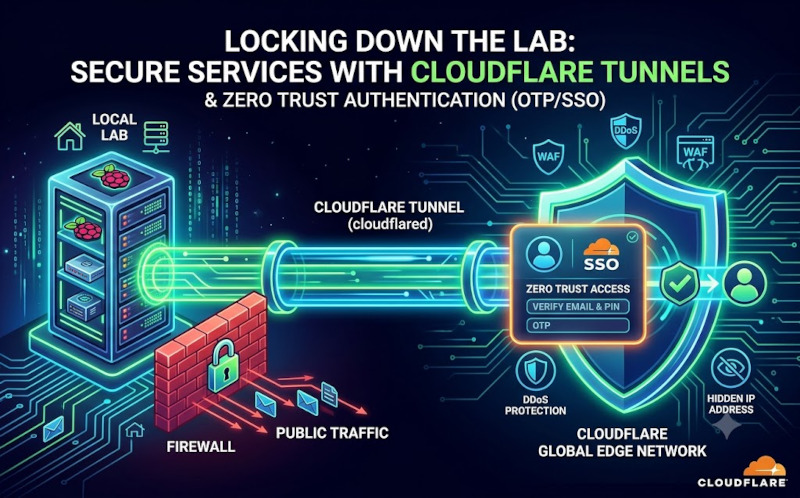
G'day mates! Welcome back to the lab. Over our past few sessions, we've fortified our networks with WireGuard and Tailscale, ensuring secure backend access for our own devices. But what happens when you want to expose a specific web service—like a Home Assistant dashboard, a web app hosted on your Dell LAMP server, or a client demo—directly to the internet without requiring the end-user to install a VPN client?
Opening ports on your router is an absolute nightmare for security. Today, we're bypassing that completely by setting up a Cloudflare Tunnel. We'll look at how incredibly secure they are, and more importantly, how to slap a bulletproof Zero Trust authentication page (essentially a modern password screen) right on the front of it. Let's crack into the terminal and get this sorted!
Why Cloudflare Tunnels are Bloody Secure
Before we install anything, let's talk about the hard yakka happening under the hood. Traditionally, if you wanted to host a website from your home lab, you had to forward ports (like 80 or 443) on your router. This is essentially leaving your front door wide open and hoping nobody comes knocking.
Cloudflare Tunnel (cloudflared) flips this concept on its head. Instead of opening a hole in your firewall, a lightweight daemon on your Raspberry Pi or server makes an outbound-only persistent connection to Cloudflare’s global edge network.
-
No Open Ports: Your home router stays completely locked down.
-
Hidden IP: Your physical home IP address is never exposed to the public internet; attackers only see Cloudflare's IP.
-
Built-in DDoS Protection: Any malicious traffic gets absorbed by Cloudflare's massive infrastructure before it even gets close to your home network.
Step 1: Install and Authenticate the Daemon
First up, SSH into the machine hosting your service (like your Ubuntu server or Raspberry Pi) and download the cloudflared package.
Bash
# Download and install the cloudflared daemon for Linux AMD64
wget https://github.com/cloudflare/cloudflared/releases/latest/download/cloudflared-linux-amd64.deb
sudo dpkg -i cloudflared-linux-amd64.deb
Once installed, you need to authenticate the daemon with your Cloudflare account. Run the following command, copy the URL it generates into your web browser, and select the domain you want to use (e.g., yazan.me).
Bash
cloudflared tunnel login
Step 2: Create the Tunnel and Route DNS
With your account linked, it's time to create the tunnel. Let's name it lab-tunnel.
Bash
cloudflared tunnel create lab-tunnel
(Make sure to copy the Tunnel UUID that gets generated here, you'll need it in a second!)
Now, tell Cloudflare to route a specific subdomain to this new tunnel. For example, if we want to expose our Home Assistant safely:
Bash
cloudflared tunnel route dns lab-tunnel secure.yazan.me
Step 3: Configure and Boot the Service
We need to tell cloudflared where to send the traffic once it reaches your local machine. Create a configuration file:
Bash
nano ~/.cloudflared/config.yml
Paste in the following YAML configuration. Replace <YOUR-TUNNEL-UUID> with the ID you copied earlier, and point the service to the local port your app is running on (like localhost:8123 for Home Assistant).
YAML
tunnel: lab-tunnel
credentials-file: /home/yazan/.cloudflared/<YOUR-TUNNEL-UUID>.json
ingress:
- hostname: secure.yazan.me
service: http://localhost:8123
- service: http_status:404
To make sure this survives a reboot, install it as a persistent system service:
Bash
sudo cloudflared service install
sudo systemctl enable cloudflared
sudo systemctl start cloudflared
Step 4: The Ultimate Defense (Adding a Zero Trust Password)
If you navigate to your subdomain right now, your site is live to the world. But we don't want just anyone looking at our smart home controls or private apps. We need a secure authentication wall.
Instead of relying on basic .htpasswd files, we are going to use Cloudflare Zero Trust to build an enterprise-grade login screen.
-
Log into your Cloudflare Dashboard and navigate to the Zero Trust portal.
-
Go to Access -> Applications and click Add an Application.
-
Select Self-hosted.
-
Enter an Application Name (e.g., "Lab Secure Portal").
-
Under Application Domain, enter the exact subdomain you just routed (secure.yazan.me).
-
Create a Policy: This is where the magic happens. Name the policy "Admin Only" and set the action to Allow.
-
Configure the Login Method: Under the "Include" rule, choose Emails and type your personal email address.
How it works: When you visit your URL, Cloudflare intercepts the request at their edge server. It presents a beautiful, branded login screen asking for your email. Once entered, it emails you a One-Time PIN (OTP). You enter the PIN, and you are granted access.
Because it uses OTPs, there are no static passwords for hackers to brute-force or leak! You can also easily connect this to Google Workspace or GitHub for instant Single Sign-On (SSO).
And that is a wrap! You’ve successfully exposed a local service to the internet with zero open ports, hidden behind an enterprise-grade Zero Trust authentication wall. It’s an absolute game-changer for securely managing the home lab from afar. Cheers!
"If you've got any questions or need a hand wrangling your own setup, don't hesitate to reach out at [email protected] or connect with me via www.yazan.me. I'm always keen to help out!"