



- Email[email protected]
- Phone+962 797 166 177
- Birthday1982-09-25
- LocationAmman, Jordan
DIY Bluetooth Magic: Turning a Raspberry Pi Pico into an iBeacon
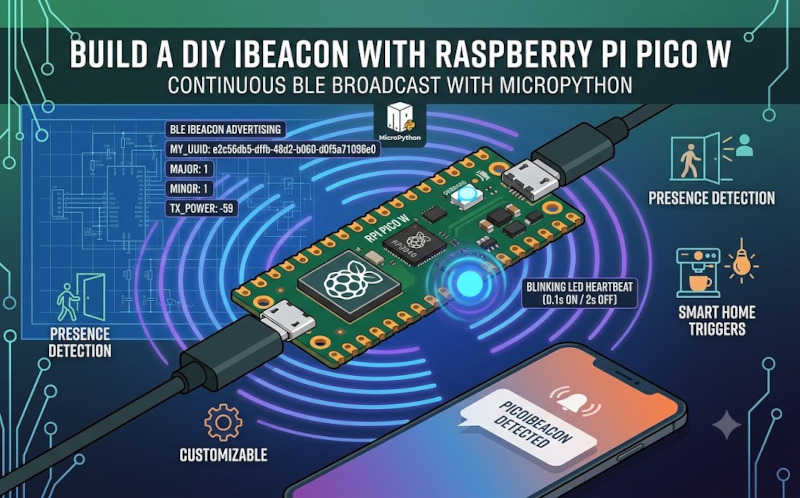
Welcome back to the lab. If you followed along with our recent office presence detection project, you know we used a Raspberry Pi Zero to scan for a Bluetooth beacon. But why buy an expensive, locked-down proprietary Bluetooth tag when you can build a highly customizable one yourself for just a few bucks? Today, we are putting in the hard yakka to turn a standard Raspberry Pi Pico W into a continuous BLE iBeacon.
By leveraging MicroPython, we can easily program the Pico to broadcast a specific UUID, Major, and Minor value, making it instantly recognizable to our presence scanners. Plus, we are throwing in a little LED blink sequence so you always know when it is actively broadcasting without draining too much power.
Let's crack open the IDE and get this sorted!
The MicroPython iBeacon Script
First, ensure your Raspberry Pi Pico W is flashed with the latest MicroPython firmware. Open up your preferred editor, create a new main.py file on the Pico, and paste in the following code:
Python
import bluetooth
import struct
import time
import machine
import ubinascii
from micropython import const
# --- CONFIGURATION ---
MY_UUID = "e2c56db5-dffb-48d2-b060-d0f5a71096e0"
MAJOR = 1
MINOR = 1
TX_POWER = -59
# Blink Configuration
BLINK_ON_TIME = 0.1 # LED stays ON for 0.1 seconds (Short blip)
BLINK_OFF_TIME = 2.0 # LED stays OFF for 2.0 seconds
# --- SETUP LED ---
# "LED" works for Pico W. If using an older Pico, use pin 25.
led = machine.Pin("LED", machine.Pin.OUT)
# --- BLE CONSTANTS ---
_IRQ_CENTRAL_CONNECT = const(1)
_IRQ_CENTRAL_DISCONNECT = const(2)
_ADV_IND = const(0x00)
_ADV_TYPE_FLAGS = const(0x01)
_ADV_TYPE_MANUFACTURER = const(0xFF)
_APPLE_COMPANY_ID = const(0x004C)
_IBEACON_TYPE = const(0x02)
class PicoBeacon:
def __init__(self):
self._ble = bluetooth.BLE()
self._ble.active(True)
self._ble.irq(self._irq)
print("BLE Activated.")
def _irq(self, event, data):
if event == _IRQ_CENTRAL_DISCONNECT:
self.start_advertising()
def _make_ibeacon_payload(self, uuid_str, major, minor, tx_power):
uuid_clean = uuid_str.replace("-", "")
uuid_bytes = ubinascii.unhexlify(uuid_clean)
payload = struct.pack("BB", 2, _ADV_TYPE_FLAGS) + struct.pack("B", 0x06)
payload += struct.pack("BB", 26, _ADV_TYPE_MANUFACTURER)
payload += struct.pack("<H", _APPLE_COMPANY_ID)
payload += struct.pack("BB", _IBEACON_TYPE, 0x15)
payload += uuid_bytes
payload += struct.pack(">HHb", major, minor, tx_power)
return payload
def start_advertising(self):
payload = self._make_ibeacon_payload(MY_UUID, MAJOR, MINOR, TX_POWER)
self._ble.gap_advertise(100000, adv_data=payload, connectable=False)
print("Advertising started...")
# --- MAIN EXECUTION ---
beacon = PicoBeacon()
beacon.start_advertising()
# --- BLINK LOOP ---
while True:
# LED ON
led.on()
time.sleep(BLINK_ON_TIME)
# LED OFF
led.off()
time.sleep(BLINK_OFF_TIME)
How It Works Under the Hood
At the very top, we define our configuration variables. The MY_UUID is the unique identifier your presence scanner will be listening for. You can generate any standard UUID for this. We also set the TX_POWER to -59, which represents the expected signal strength at exactly one meter away, helping your scanner accurately calculate distance.
The PicoBeacon class handles the heavy lifting of the Bluetooth protocol. The _make_ibeacon_payload function meticulously constructs the byte array required to mimic the Apple iBeacon standard. This involves packing the manufacturer data, the UUID, and the major/minor versioning numbers into a specific format that any BLE scanner can interpret.
Finally, we trigger the advertising loop and enter an infinite while True loop that handles our visual feedback. The onboard LED pulses on for a quick 0.1-second blip and rests for 2.0 seconds, acting as a heartbeat monitor for your new DIY tag.
Save this script directly to your Pico as main.py, unplug it from your PC, and hook it up to a simple USB power bank or a standard wall adapter. You now have a brilliant, custom-built presence tag ready to trigger your morning coffee!
"If you've got any questions or need a hand wrangling your own setup, don't hesitate to reach out at [email protected] or connect with me via www.yazan.me. I'm always keen to help out!"