




- Email[email protected]
- Phone+962 797 166 177
- Birthday1982-09-25
- LocationAmman, Jordan
Building a Smart Home RFID Entry System with a Raspberry Pi and Home Assistant
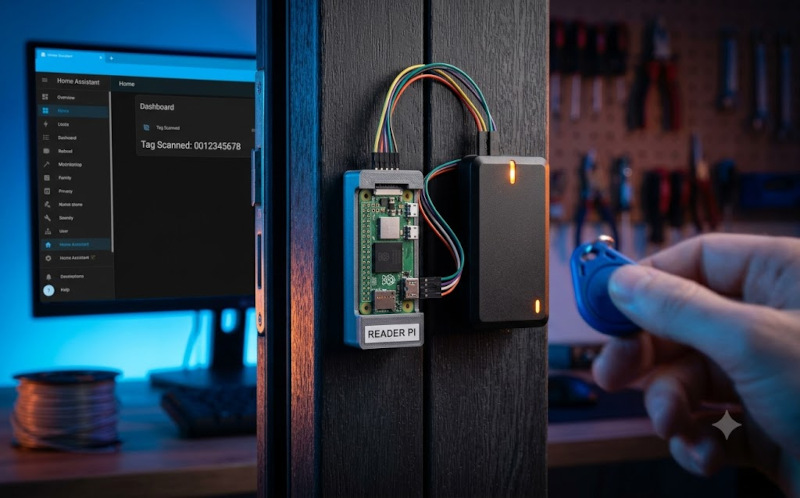
G'day mates! Welcome back to the lab. Over our past few sessions, we have been busy fortifying our network and setting up localized voice control. Today, we are focusing on physical access. We are going to build a dedicated "Reader Pi" to sit at the main door, using a simple Python script to communicate directly with Home Assistant.
Instead of relying on proprietary cloud-based smart locks, we are taking a standard USB RFID/IC card reader—which essentially acts as a basic keyboard—and intercepting its inputs to trigger native Home Assistant tag events.
Let's fire up the terminal and get building!
Step 1: Install Dependencies and Set Permissions
First, we need to ensure our Pi has the right tools to read Linux input events and send HTTP requests to our Home Assistant server. We will also add our user (in this case, reader) to the input group so the script doesn't need to be run as the root user.
Bash
sudo apt update
sudo apt install python3-evdev python3-requests
sudo usermod -aG input $USER
(Note: You may need to log out and log back in for the group permission change to take effect).
Step 2: Identify Your RFID Reader
USB RFID readers usually emulate a keyboard. When you scan a card, they rapidly "type" the card's ID number and press Enter. We need to find the exact hardware ID of your reader so our script knows where to listen.
Plug in your reader and run:
Bash
ls -l /dev/input/by-id/
You should see an output pointing to an event handler, something like this:
usb-IC_Reader_IC_Reader_08FF20171101-event-kbd -> ../event18
Copy that full device path; we will need it for the script.
Step 3: Write the Python Interceptor Script
Now we will write the Python script that listens to this specific USB device, translates the raw keystroke scancodes into a string, and fires it off to the Home Assistant API.
Bash
mkdir ~/scripts
nano ~/scripts/rfid_reader.py
Paste the following code. Make sure to update the HA_URL and HA_TOKEN with your Home Assistant server's IP and a Long-Lived Access Token.
Python
import evdev
from evdev import ecodes
import requests
import sys
# --- CONFIGURATION ---
DEVICE_PATH = "/dev/input/by-id/usb-IC_Reader_IC_Reader_08FF20171101-event-kbd"
HA_URL = "http://192.168.3.229:8123/api/events/tag_scanned"
HA_TOKEN = "YOUR_LONG_LIVED_ACCESS_TOKEN_HERE"
DEVICE_ID = "f2_reader" # Name this reader (no spaces)
# ---------------------
scancodes = {
2: ('!', '1'), 3: ('@', '2'), 4: ('#', '3'), 5: ('$', '4'), 6: ('%', '5'), 7: ('^', '6'), 8: ('&', '7'), 9: ('*', '8'), 10: ('(', '9'), 11: (')', '0'),
16: ('Q', 'q'), 17: ('W', 'w'), 18: ('E', 'e'), 19: ('R', 'r'), 20: ('T', 't'), 21: ('Y', 'y'), 22: ('U', 'u'), 23: ('I', 'i'), 24: ('O', 'o'), 25: ('P', 'p'),
30: ('A', 'a'), 31: ('S', 's'), 32: ('D', 'd'), 33: ('F', 'f'), 34: ('G', 'g'), 35: ('H', 'h'), 36: ('J', 'j'), 37: ('K', 'k'), 38: ('L', 'l'),
44: ('Z', 'z'), 45: ('X', 'x'), 46: ('C', 'c'), 47: ('V', 'v'), 48: ('B', 'b'), 49: ('N', 'n'), 50: ('M', 'm'),
57: (' ', ' ')
}
def main():
print(f"Attempting to connect to: {DEVICE_PATH}")
try:
device = evdev.InputDevice(DEVICE_PATH)
device.grab() # Grabs the device so keystrokes don't bleed into the terminal
except Exception as e:
print(f"Error: {e}")
sys.exit(1)
code = ""
print("Listening for cards...")
for event in device.read_loop():
if event.type == ecodes.EV_KEY and event.value == 1:
if event.code == ecodes.KEY_ENTER:
if code:
clean_code = code.strip()
print(f"Scanned Tag: {clean_code}")
try:
# --- HA REQUEST LOGIC ---
headers = {
"Authorization": f"Bearer {HA_TOKEN}",
"Content-Type": "application/json",
}
payload = {
"tag_id": clean_code,
"device_id": DEVICE_ID
}
requests.post(HA_URL, json=payload, headers=headers)
print("Sent to HA Native Tag API")
except Exception as e:
print(f"Failed to send: {e}")
code = ""
else:
key_lookup = scancodes.get(event.code)
if key_lookup:
code += key_lookup[1]
if __name__ == "__main__":
main()
Step 4: Create a Persistent Systemd Service
We want our front door scanner to work 24/7 without us needing to manually run the script. Systemd is the perfect tool for this.
Bash
sudo nano /etc/systemd/system/rfid-reader.service
Add the following configuration:
Ini, TOML
[Unit]
Description=RFID Reader Service
After=network.target
[Service]
Type=simple
User=reader
Group=input
ExecStart=/usr/bin/python3 /home/reader/scripts/rfid_reader.py
Restart=always
RestartSec=5
[Install]
WantedBy=multi-user.target
Step 5: Boot It Up!
The hard work is done. Reload your system daemon, enable the service to start on boot, and fire it up.
Bash
sudo systemctl daemon-reload
sudo systemctl enable rfid-reader.service
sudo systemctl start rfid-reader.service
sudo systemctl status rfid-reader.service
Troubleshooting Tip: If your service keeps crashing or says the device is busy, another background process might be holding onto your USB reader. You can find out exactly what is hugging the device by running:
sudo fuser -v /dev/input/by-id/usb-IC_Reader_IC_Reader_08FF20171101-event-kbd
And there you have it! Scan a card, and the tag ID will instantly populate inside Home Assistant's built-in tag manager, ready to be tied to an automation that unlocks a door or disarms your alarm.
"If you've got any questions or need a hand wrangling your own setup, don't hesitate to reach out at [email protected] or connect with me via www.yazan.me. I'm always keen to help out!"