




- Email[email protected]
- Phone+962 797 166 177
- Birthday1982-09-25
- LocationAmman, Jordan
Building a Custom ESP32 iBeacon with an OLED Status Display using ESPHome
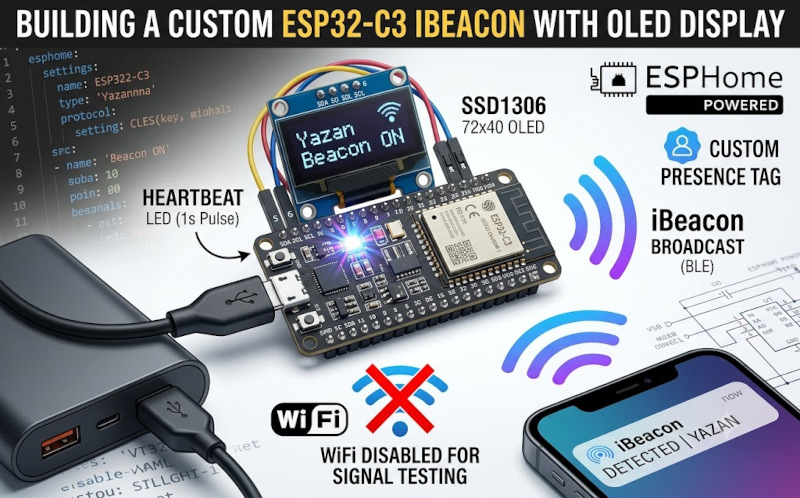
Welcome back to the lab, mates! If you caught our last project, you know we put in the hard yakka to turn a Raspberry Pi Pico W into a continuous BLE iBeacon for presence detection. But what if you want to use the legendary ESP32 ecosystem, specifically the tiny ESP32-C3, and throw a cheeky little OLED display into the mix?
Today, we are taking a standard ESP32-C3 DevKitM-1 and flashing it via ESPHome to act as a dedicated iBeacon. We are also wiring up a mini 72x40 SSD1306 display to give us real-time visual feedback on the desk.
Let’s crack into the configuration and get this sorted!
The ESPHome YAML Configuration
Fire up your ESPHome dashboard, create a new device, and paste in this configuration. Notice that we are intentionally leaving WiFi disabled to focus entirely on testing pure Bluetooth signal strength and reliability.
YAML
substitutions:
name: "esp32-ibeacon"
esphome:
name: ${name}
friendly_name: "ESP32 iBeacon"
# MERGED: The boot check is now correctly placed here
on_boot:
then:
- logger.log: "I AM AWAKE AND STARTING BEACON!"
esp32:
board: esp32-c3-devkitm-1
variant: esp32c3
framework:
type: arduino
# ---------------------------------------------------------
# Connectivity (WiFi DISABLED for Signal Testing)
# ---------------------------------------------------------
# wifi:
# networks:
# - ssid: !secret wifi_ssid
# password: !secret wifi_password
logger:
hardware_uart: USB_CDC
level: DEBUG
# ---------------------------------------------------------
# CRITICAL FIX: Forces C3 Bluetooth Stack to Wake Up
# ---------------------------------------------------------
esp32_ble_tracker:
scan_parameters:
active: false
# ---------------------------------------------------------
# BEACON
# ---------------------------------------------------------
esp32_ble_beacon:
type: iBeacon
uuid: "E2C56DB5-DFFB-48D2-B060-D0F5A71096E0"
major: 1
minor: 2
min_interval: 200ms
max_interval: 300ms
measured_power: -59
# ---------------------------------------------------------
# I2C & DISPLAY
# ---------------------------------------------------------
i2c:
sda: 5
scl: 6
scan: true
id: bus_i2c
font:
- file: "gfonts://VT323"
id: my_font
size: 16
display:
- platform: ssd1306_i2c
model: "SSD1306 72x40"
address: 0x3C
id: my_display
lambda: |-
it.printf(0, 0, id(my_font), "Yazan");
it.printf(0, 16, id(my_font), "Beacon ON");
# ---------------------------------------------------------
# LED
# ---------------------------------------------------------
output:
- platform: gpio
pin:
number: 8
inverted: true
id: onboard_led_pin
light:
- platform: binary
output: onboard_led_pin
id: heartbeat_led
interval:
- interval: 1s
then:
- light.turn_on: heartbeat_led
- delay: 100ms
- light.turn_off: heartbeat_led
Under the Hood: How This Setup Ticks
Let's break down exactly why we've configured this board the way we have, ensuring your home lab runs like an absolute dream:
-
The C3 BLE Stack Fix: The ESP32-C3 can be a bit stubborn when it comes to firing up its Bluetooth stack. By including the esp32_ble_tracker block with active: false, we effectively give the chip a swift kick to wake up the radio without actually scanning for other devices, saving precious processing power.
-
iBeacon Parameters: Just like our previous Pi Pico build, we define our UUID, Major (1), and Minor (2) values. The measured_power is set to -59, which gives your receiving nodes an accurate baseline to calculate exactly how far away this tag is.
-
Visual Status (I2C OLED): We've wired up a tiny SSD1306 screen to pins 5 (SDA) and 6 (SCL). By pulling down the slick "VT323" Google Font, the display proudly prints your name and confirms the beacon is broadcasting. It’s a brilliant way to debug without needing to tether the board to a serial console.
-
The Heartbeat LED: Instead of a static light, we’ve set up an interval loop that briefly flashes the onboard LED (GPIO 8) every second. This gives you instant visual confirmation that the board hasn't locked up.
Once you hit install and flash this firmware over USB, you can plug this little beauty into any standard power bank or wall adapter. You've now got a fair dinkum, highly customizable presence tag ready to seamlessly trigger your smart home automations!
"If you've got any questions or need a hand wrangling your own setup, don't hesitate to reach out at [email protected] or connect with me via www.yazan.me. I'm always keen to help out!"